Coleman RV Air Conditioner Dripping Water Inside: Reasons and Repairs
Coleman Air conditioners have always been a reliable choice for RV owners for a long time. Despite being durable, even this Coleman air conditioner can leak water inside your RV because of damage. Especially when it rains or the air conditioner is running, this occurrence is an extremely frustrating problem.
The Coleman RV air conditioner drips water inside because of a clogged drain pipe, dirty evaporating oil or loose connections. Incorrect sealing of the air conditioner components or damaged rubber gasket can also cause this problem.
I will discuss in detail about each of the reasons that lead the Coleman air conditioner to drip water inside your RV. You will also get to know how to fix those issues with a step by step guide.
How The Coleman RV Air Conditioner Works?
The Coleman air conditioner line offers you a wide variety of choices when it comes to choosing a particular air conditioner for your beloved RV.
The Mach series of Coleman is a popular air conditioner choice amongst the RV owners. These durable, reliable ACs are easy to install and use no matter what the model is.
The Coleman air conditioner has a working principle where it draws heat from the inside of the RV.
This heat is then released outside and thus, keeping the RV cool and comfortable. There should be no water dripping from the air conditioner if everything was working perfectly well.
Read Also: Why Thetford RV Toilet Won’t Stop Running & How to Fix It?
What Causes Coleman Air Conditioner Dripping Water Inside?
I have faced this issue myself where my Coleman RV air conditioner kept dripping water inside the RV. It is a terrible inconvenience from all aspects.
According to my research, I have compiled the list of causes that make the Coleman air conditioner drip water inside. Take a look at these reasons to identify what is causing the problem in your air conditioner.
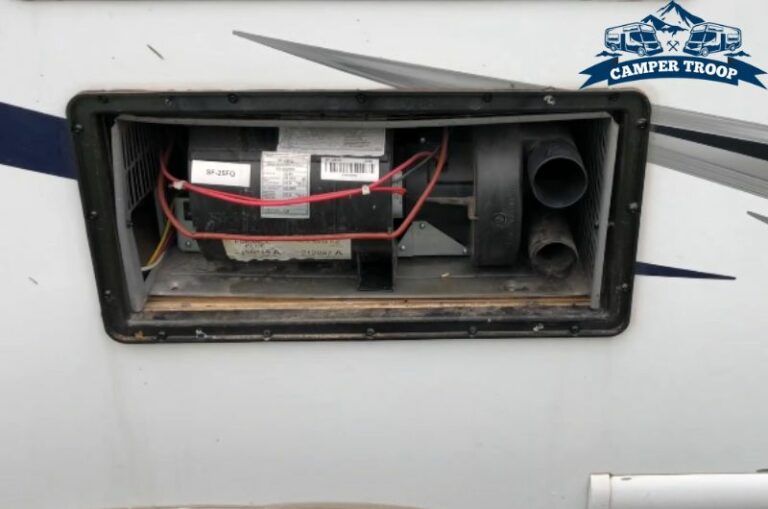
1. Clogged drain pan or drain pipe
The main function of the drain pan and pipe is to take the water from the evaporating coil and drain this water outside. However, if there is buildup in the drain pan over time, it gets severely clogged.
This clogging can occur due to dirt and small debris getting stuck inside the drain pipe. A clogged drain pan and pipe like this can prevent airflow inside the drain pipe.
This obstacle will not release the air and water outside. So, the accumulated water ends up dripping down on the inside of the RV.
2. Dirty Evaporating Coil
The evaporating coil is connected to the drain pan and pipe and functions together with them. This evaporating coil transforms the air into moist water which the drain pipe releases outside.
Over time and use, the evaporating coil gets dirty and accumulates dust. When that happens, it fails to expel the water outside according to the process and ends up dripping inside the RV.
3. Incorrect Rubber Gasket Installation
The function of a rubber gasket is to seal the air conditioner with the wall properly. For this, there needs to be an appropriate amount of gap between the rubber gasket and the air conditioner. The acceptable amount of gap here should be a minimum half inch.
In case the gap is too much or too less, the water will have no way to go outside and instead leak inside. Due to the ultraviolet rays, the rubber gasket can also get pretty damaged which will result in the same thing again.
4. Improper Air Conditioner Sealing
While installing the air conditioner, sealing each of the components properly is one of things you should be careful about.
If the air conditioner is not sealed properly, rainy weather can make the situation worse by leaking inside.
Both the rainwater and dirt will get inside the air conditioner and eventually drip inside the RV too.
Read Also: How to Get 12V Power From a Trailer Plug? (Multiple Methods)
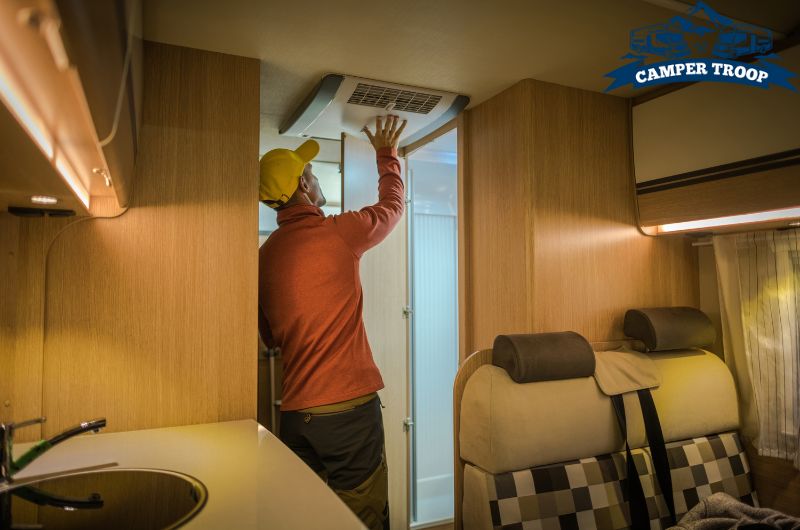
How To Fix Coleman RV Air Conditioner Dripping Water Inside?
Once you have figured out the specific cause for the water dripping down your air conditioner and inside your RV, it is time to fix it.
Personally, I have tested out all of these fixes whenever I ran into trouble with my RV. Here are the detailed guide to fixing the water dripping problem of the Coleman air conditioner:
Clean The Drain Pan And Drain Pipe Properly:
The best way to keep the drain pan clean is to check the insides of it routinely. When you find dirt buildup in the drain pipes and in the drain pan, follow these steps to clean it thoroughly:
- Firstly, shut down the RV completely.
- Make sure to turn the air conditioner off too and switch off the breaker for safety.
- Unscrew the air conditioner with proper tools.
- Remove the cover on top of the drain pan.
- Get rid of the accumulated water and dirt on the drain pan and dry it off.
- Next, check until the end of the drain pipes in order to find debris and dirt buildup.
- Use a sponge, soft brush or a vacuum to clean the insides of the drain pipe properly.
- You can use vinegar too in order to prevent any kind of mold growing.
- Place the evaporating cover on top of the drain pipe again and safely screw the air conditioner cover on.
Clean The Evaporating Coil:
Cleaning the evaporating coil requires the same procedure as cleaning the drain pan I have mentioned previously. Follow the first few steps to get to the inside of the air conditioner with the instructions I have provided above.
Since the evaporating coils are more prone to damage and are pretty sensitive, make sure to use a gentler cleaning process for it. For instance, you can follow these instructions:
- Locate the evaporating coil after removing the evaporating cover.
- Spray a cleaning solution made with mild soap and water all over the coils. Focus on the dirtier parts.
- Gently wipe the cleaning solution out with a soft brush or sponge.
- Let the coils dry out completely.
- Place the cover back on top of the drain pan again.
Read Also: AO Smith 2-stage Water Filter Leaking | Here’s What You Can Do!
Re-install or Replace The Rubber Gasket Properly:
If there was an installation error such as the gap I have mentioned, you will need to reinstall the rubber gasket. In case, the rubber gasket has been too damaged over time, it would be a better idea to replace it. In both cases, you need to know how to remove and then install the gasket correctly. I will share the method below:
- For a replacement, firstly purchase a new rubber gasket that suits the dimensions of the air conditioner perfectly.
- Turn off the RV completely and take necessary precautions for safety.
- Safely get on the roof of the RV to remove the bolts of the air conditioner from on top,
- After removing the upper part of the RV, locate the rubber gasket inside.
- Safely take out the rubber gasket from inside.
- Place the new gasket making sure that there is half an inch of gap between it and the air conditioner.
- Tighten the bolts to connect the gasket enough so that it is compressed by about 50%.
- Screw the air conditioner back on properly before getting off the roof.
Use Proper Sealant:
It is the simplest fix you have to take care of. Locate the seals where it has worn off or not done properly first. Clean the area around the seal and then replace it with a new and better one.
If you want to keep using the same sealant, make sure to stretch it out more. Use another coat of protective sealant on top of it to increase its strength and effect.
It is also possible to use heat to melt and solidify the sealants even more. But it could be dangerous too so it is better not to do it on your own.
Read Also: Lippert Leveling System Won’t Turn On: Reasons And Solutions
FAQs.
I will cover some of the most asked questions about the Coleman RV air conditioner maintenance. I have answered these concerns of the users of this air conditioner thoroughly in this section.
How Can I Unclog A Coleman RV AC Drain?
You can unclog the air conditioner drain by using a vacuum hose the fastest. If you can’t get your hands on a proper vacuum for it, use a soft brush or damp sponge. It might take more time and effort but it will unclog and clean the air conditioner drain just as perfectly.
Can I Pour Bleach On The Drain Pipe To Clean It?
It is better not to pour bleach in your air conditioner drain pipe. There can be copper wires and materials infused in the drain pipes. A strong agent like bleach coming in contact with this copper can cause corrosion of the pipes. You can use vinegar instead of bleach for a safer result.
How Do I Reduce The Condensation On Air Conditioners?
There is nothing much you can do to get rid of the condensation on your air conditioner. It mostly depends on the weather you have camped the RV in. If you can reduce the humidity level of the air inside, it can reduce condensation a lot. Use a humidifier to reduce the humidity especially around the air ducts of the AC.
How Much Will It Cost To Fix The Coleman Air Conditioner Parts?
In order to fix the dripping water problem on Coleman AC, it can cost between $75 to $950. If you need to only clean the drain pan and pipe, it will take about $75-$250 depending on your use of vacuum. A new evaporating coil will cost $400-$950. New Rubber gaskets will cost $39-$70.
Conclusion
Coleman RV air conditioner will last you a long time and give you the best service during this time. The only thing you need to make sure of is to check out the drain pan, drain pipe, rubber gasket and the seals periodically.
Take the necessary steps I have prepared for you in this guide when you find a related problem. If you are not familiar with the inner and outer elements of the RV and the air conditioner, do not try the fixes on your own.
It is recommended to contact a professional to take care of the more difficult fixes safely. Only a scheduled maintenance of the air conditioner can ensure an experience without having to deal with water dripping in your RV.
Read Also: Why Does My RV Have No Power From Battery? (Explained)

Zayan is an accomplished author and a go-to expert for all things RV and camper-related. With a passion for adventure and a knack for problem-solving, he has spent years exploring the open road and fine-tuning his knowledge of recreational vehicles.
Zayan’s writing is a testament to his expertise, offering readers practical solutions to common RV dilemmas. Whether it’s troubleshooting mechanical issues, optimizing space, or planning the perfect road trip, Zayan’s insightful advice and engaging storytelling make him an invaluable resource for both seasoned travelers and newcomers to the world of RVing.
![7 Common Problems with Residential RV Refrigerators [Solved]](https://campertroop.com/wp-content/uploads/2023/08/Residential-RV-Refrigerators-Problems-768x509.jpg)

![Why Is The Forest River Furnace Not Working?[With Solutions]](https://campertroop.com/wp-content/uploads/2022/12/Forest-River-Furnace-Not-Working-768x509.jpg)