Most Common Problems with Jayco Journey & Their Solutions
Every travel trailer has problems, and it’s essential to have a clear idea about the problems and their solutions. When discussing the Jayco Journey, you may also have to deal with some issues. Some problems are minor, whereas others can cost you a lot of money.
But what are the most common Jayco Journey problems? The most frequent problems with the Jayco Journey are water leakage, a cracked or leaky roof, a noisy water pump, stuck windows, rusting gas cover handle, unfinished edges, and more. So doesn’t the Jayco journey seem pretty problematic?
Once you discover issues with your Jayco Journey RV, you must act to resolve them. Fortunately, this blog covers the troubleshooting guide for the most common Jayco Journey problems.
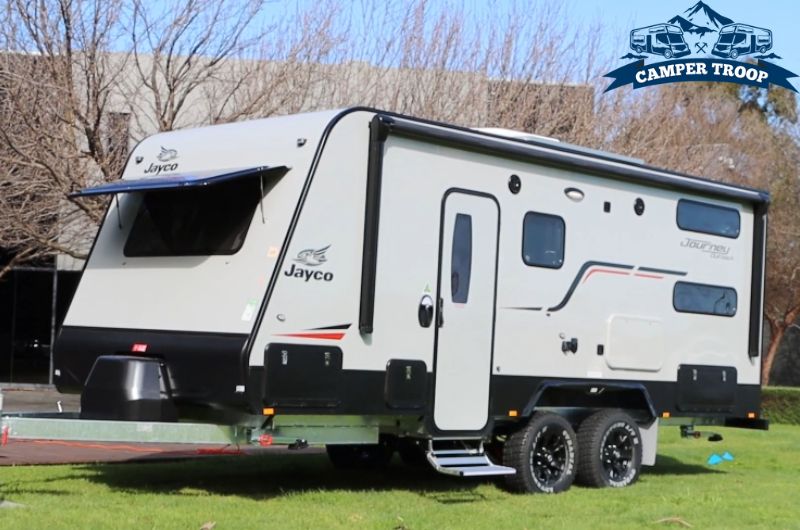
What Are The Common Problems With The Jayco Journey?
It’s natural to face some issues with the Jayco Journey travel trailer. However, after serious discussions with the users, we have sorted out some of the critical Jayco Journey issues.
Moreover, the Jayco Journey is known to have some difficulties within a short time. Let’s see the most irritating problems below.
- Water leakage
- Faulty braking system
- Unfinished edges
- Leaky/cracked roof
- The door comes inside the caravan
- Oil spots beside the kitchen area
- Noisy water pump
- Scrubbed out tires
- Wear and tear on the exterior
How Do You Troubleshoot and Fix Jayco Journey Problems?
You’ve got some ideas about the possible problems with the Jayco Journey caravan.
Well done!
Now, you will find a lot of ease while troubleshooting the issues. We will also demonstrate the causes and symptoms of the issues below.
Read Also: 4 Common Jayco Eagle Problems & Solutions
Problem 1: Water Leakage
Water leakage is one of the significant problems with any travel trailer. Unfortunately, the issues have become more frequent regarding the Jayco Journey as well.
Extreme water leakage can cause many problems. For example, you may notice flooring damage and corrosion in different parts of the RV.
What Causes Water Leakage On Jayco Journey?
Many possible reasons can cause water leakage problems on the Jayco Journey. However, if the water pump of the Jayco Journey goes bad or is damaged, it will cause the issue of water leakage.
Some of the symptoms of water leakage include:
- Broken water pipe.
- Damaged roof seals and loose sealant.
- Faulty window or door seals.
- Cracks and gaps on the walls.
How To Fix Water Leakage On Jayco Journey?
You should start the water leakage troubleshooting by discovering the source of the leakage. If the water pump or tank goes bad, you should also inspect it.
- Check where the water comes from by checking all the possible leakage sources.
- Next, check the water pump to see any additional damage.
- Repair the roof seams if they go bad or there are significant gaps.
- Replace the door and window sealants if they are leaking.
- If the water pump becomes faulty, replace it with a new one.
- Finally, repair or replace the leaky water pipe.
- Repair the kitchen sink with tape if it becomes damaged.
How Much Does It Cost To Fix Water Leakage On Jayco Journey?
The cost will depend on what causes the water leakage problem on the Jayco Journey. However, you may need to spend around $500-$600 on average. The cost increases because of the faulty water pump or tank.
- Mechanical Cost: $250-300$
- Parts/Replacement Cost: $250-300$
Read Also: Common Jayco Outback Problems & Solutions
Problem 2: Faulty Brake Control System
Unfortunately, you will notice the braking system of the Jayco North Point being faulty on some occasions. Moreover, the majority of the problems are with the electrical braking controller.
One of the most common symptoms of a faulty electrical braking system is that it weakens over time. So, this type of problem needs to be fixed immediately.
What Causes A Faulty Brake Control System On A Jayco Journey?
Before that, let us remind you of an important fact: the Jayco Journey has one brake for its four wheels. However, the electronic braking system Jayco Journey has always been a disturbing fact.
One of the most common reasons for this problem is broken wires. Some of the other causes of the issues are:
- Poor electrical connection
- Broken wires.
- Corroded connection.
- Undersized brake cabling
- Broken brake component.
- Faulty brake controller.
How To Fix A Faulty Brake Control System On A Jayco Journey?
First, you need to check the electrical connection of your Jayco journey brake system. No change in the braking system functions appropriately if there is insufficient connection.
- Cheek the electrical connection of the brake to see whether there is enough voltage.
- If there is voltage loss, you must supply additional voltage to the electrical magnet.
- Check whether there is a corroded connection.
- Clean and repair the corroded connection.
- Check the brake cabling.
- Replace the undersized brake cabling with 100% copper.
- Check all the brake components and parts.
- Check the broken wire.
- Repair or replace it based on the type of damage.
- Replace the brake component if there is severe damage.
- Test the brake controller.
- Replace or repair the controller based on its condition.
How Much Does It Cost To Fix A Faulty Brake Control System On A Jayco Journey?
The repair cost will vary because there are quite a few issues that can cause a faulty brake system on the Jayco Journey. But, on average, fixing the braking system issues can cause you around $300-$600.
- Mechanical Cost: $100-$200
- Parts/Replacement Cost: $200-400
Read Also: Common Jayco North Point Problems & Solutions
Problem 3: Unfinished Edges
The unfinished edges can be another most visible issue regarding the Jayco Journey. Nonetheless, some users find it unexpected to discover a case like this with Jayco. You can notice the unfinished edges around the buck beds.
However, the unfinished edges sometimes decrease the interior beauty of the travel trailer. Besides, if you have children, the unfinished edges can also hurt them.
What Causes Unfinished Edges On The Jayco Journey?
Users find the problem of the unfinished edge in different stages of their user journey. However, if the wood around the bunk bed area is This is more likely to happen due to careless finishing while manufacturing the travel.
But, it can also happen that, as time passes, the finished wood becomes damaged and causes unfinished edges.
How To Fix Unfinished Edges On Jayco Journey?
First, you need to check the condition of the edges. Based on that, you should repair the edges. In most cases, you will find unfinished wood edges around the bunk area of the caravan.
So, in this case, you need to repair the edges and give them perfect shapes. Furthermore, repairing won’t do; it would be better if you made new edges and fitted them around the bunk area.
How Much Does It Cost To Fix Unfinished Edges On Jayco Journey?
Luckily, you don’t need to spend too much money to fix unfinished edges on the Jayco Journey. On average, it costs around $50-$100, depending on the finished problems.
- Mechanical Cost: $20-$30.
- Parts/Replacement Cost: $30-$70.
Read Also: Common Jayco White Hawk Problems & Solutions
Problem 4: Leaky Roof
Roof leakage is another irritating problem, and it becomes more acute when heavy rain or damage occurs. However, we have seen this issue with most Jayco travel trailers.
The most common symptom of a leaky roof is that you will notice water drops from the roof down to the floor when there is rain. You may also see the crack from the inside part of the roof.
What Causes a Leaky Roof On A Jayco Journey?
Among the few important causes, the harsh weather conditions are a culprit behind roof leakage or cracked issues.
You need regular maintenance to keep the roof protected from bad weather. So, lack of care can be another reason for roof leakage. Other possible causes are:
- Unexpected damage.
- Poor roof seals.
- Puncture in the roof membrane.
How To Fix a Leaky Roof On A Jayco Journey?
One thing is clear: you need to be careful about the roof maintenance on Jayco’s journey. Use the travel trailer roof cover when it is extremely hot or rainy.
Furthermore, follow the below steps carefully.
- Clean the roof.
- Check the damage.
- If the damage or crack is extreme, you must apply the proper sealant to the roof.
- Use the rubberized leak stopper if you find tiny holes in the roof. You can also use tape as well.
- Replace the roof seals if they are damaged.
How Much Does It Cost To Fix A Leaky Roof On A Jayco Journey?
It depends on the level of leakage. However, if there are significant issues, fixing a leaky or cracked roof will cost you anywhere from $700-$1500. If you can fix some of the causes on your own, you will save a lot of money.
Conclusion
Always take enough time to fix any of the Jayco Journey Problems. It will be better if you start with the basic causes of any problem. Furthermore, most issues have more than one symptom. So, make sure you are pretty sure about them as well.
Most users often make a mistake waiting for the warranty period to take further steps to fix any problems. But, this is not a good approach. Instead, once you notice the symptoms, you should start troubleshooting the issues.
Besides, never mind calling a professional in this case to fix the Jayco Journey Problems. If you DIY, you’re welcome.
Read Also: Common Jayco Caravan Problems & Solutions

Zayan is an accomplished author and a go-to expert for all things RV and camper-related. With a passion for adventure and a knack for problem-solving, he has spent years exploring the open road and fine-tuning his knowledge of recreational vehicles.
Zayan’s writing is a testament to his expertise, offering readers practical solutions to common RV dilemmas. Whether it’s troubleshooting mechanical issues, optimizing space, or planning the perfect road trip, Zayan’s insightful advice and engaging storytelling make him an invaluable resource for both seasoned travelers and newcomers to the world of RVing.

![5 Common Little Guy Trailer Problems [Solutions Included]](https://campertroop.com/wp-content/uploads/2021/11/Little-Guy-Trailer-Problems-768x509.jpg)
