When To Use The Check Valve, Before Or After Pump? Find Out!
If you are entering the RV lifestyle, or at least are planning to do so, you need to be aware of its water pumping system. And a check valve is a crucial part of it.
You need to use the check valve before the pump. Because if you put the check valve after the pump, the water pump might keep cycling. So, the appropriate place for the check valve is between the pump and the tank.
While putting a check valve there, you must ensure that the water flows from that point toward the pump. And speaking from my own experience, the water system can get disrupted if it flows towards the tank.
How to Use The Check Valve in an RV? A Step-by-Step Guide
Using a check valve in an RV is vitally important. Without it, the water flow can change its direction, which has the potential to cause great trouble. So, you need to use a check valve correctly, for which I will help you out.
Step 1: Identify the Right Valve Spot
There are several spots for checking valves in an RV. Like my RV has three check valves. One is with the city water port, another is with the water heater, and the primary is with the water pump. You have to choose the one that is with the pump.
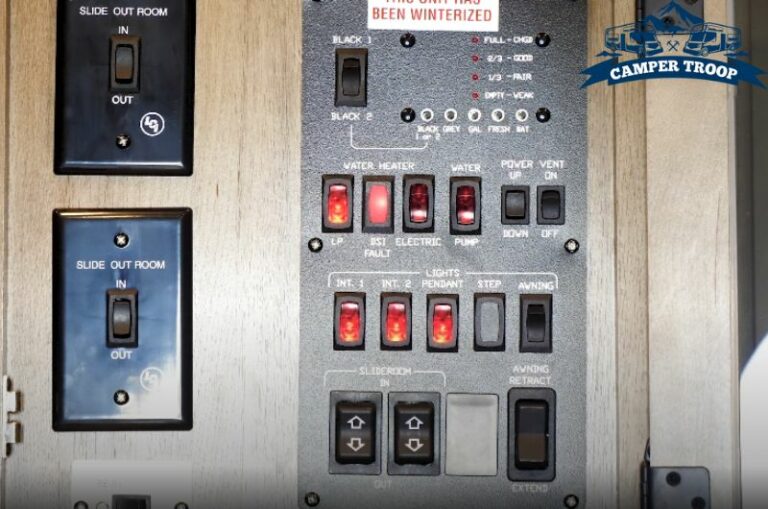
Step 2: Turn off the Water Pump and Tank
Before beginning the installation process, you need to ensure that the water flow in the system is not being manipulated. You have to turn off the water pump and the tank. While there are several ways to turn it off, I always follow the conventional one.
So; there’s a T-shaped valve in most RV water tanks. The T-shaped valve is pulled up when the water tank is turned on. And when it is off, it is pushed down. Consequently, it would be best to push it down to turn it off.
In the case of the water pump, you shut it off by simply switching it off. Every water pump has one main switch, so you should have one. Most water pumps, including mine, are beneath the couch of an RV. So, it would be best if you looked there first.
Read Also: Why 15 Amp Fuse Keeps Blowing In Rv: How to Fix it?
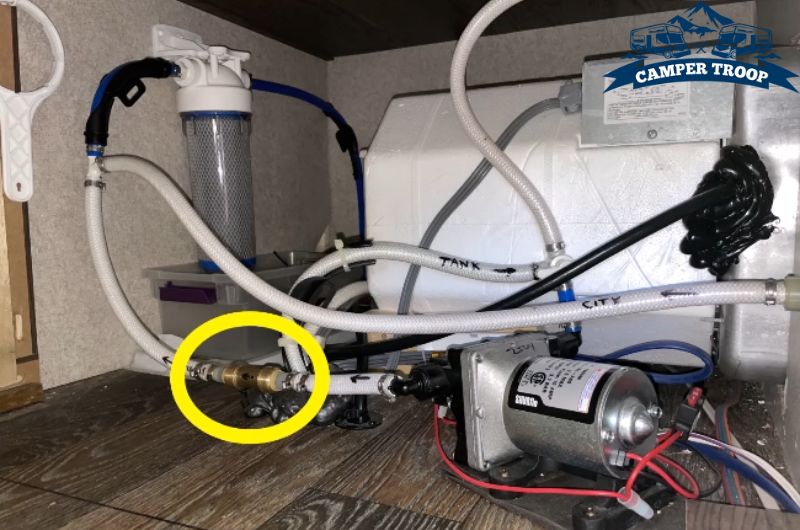
Step 3: Find the Check Valve Position Right Before the Pump
The hose between the water tank and the pump is the right place for a check valve. Your RV has a check valve between your water tank and the pump. And you have to use a new check valve right there.
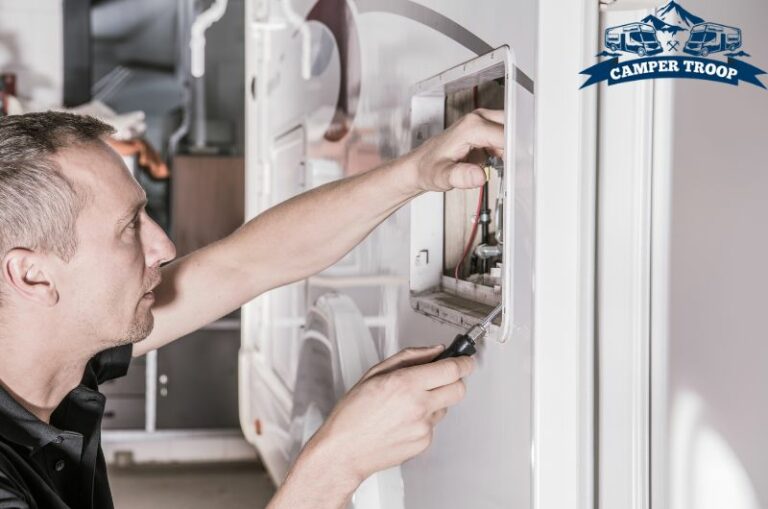
Step 4: Disassemble the Old Check Valve
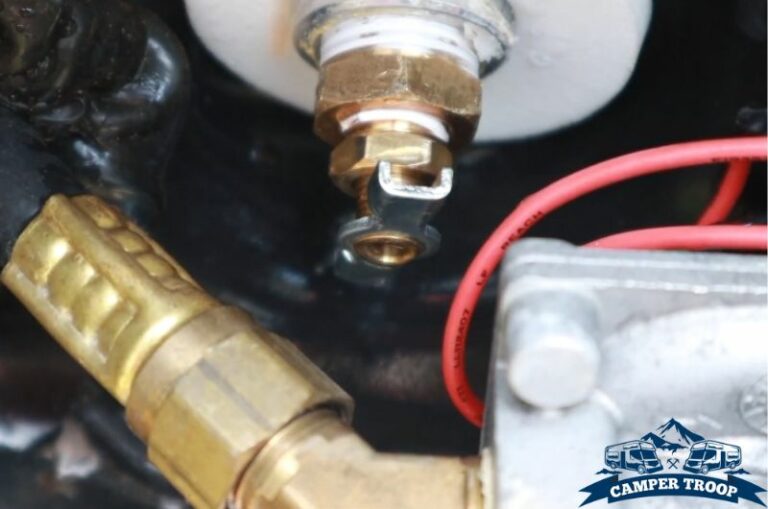
Some RVs have their primary check valves installed within the pump, whereas my one has it outside. Since yours is on the outside, disassembling it will be easy.
First, I always pull the plunger out. Then the rubber end, and the clip comes off automatically. Sometimes the spring will get loose and come off as well, but in most cases, you might need to pull it out manually.
Step 5: Assemble the New Check Valve
If any of the check valve parts seems broken, you can change it and reassemble it. But if not, assume that the check valve is broken and you need to use a new one.
To use a new check valve, you must reassemble it between the tank and the pump, which is before the pump. And while reassembling, do the reverse of what you did while disassembling.
Read Also: Complete Guide on How to Jack Up a Travel Trailer in 4 Steps
What Problems Can You Face While Using a Check Valve in an RV?
Since this tool seldom needs a fix, most people aren’t just aware of its proper utilities. To help you out, I have listed the three most common issues you might face while using an RV check valve.
Using the Wrong Check Valve
Since multiple check valves exist in an RV, the most common mistake is using the wrong one. If a failure within its water system fails due to a check valve, chances are high it is the pump check valve.
And by a pump check valve, I mean either inside or between the pump and the tank. So the solution is to fix the most near the tank valve.
Stopped Water Wye
A check valve stops the water direction from going to the wrong path. As a consequence, the water wye sometimes can stop functioning since water flow is being manipulated by the check valve.
If this happens, you can easily fix it by just screwing one of the male ends that is at the side of the city water hookup.
Reversed Water Flow
In this case, water flows ahead of the check valve, which causes a reverse flow. When this happens at the pipe inlet, it may be exceedingly costly and dangerous since it causes the pump to rotate in reverse. It ruins the pump over time.
I always prevent this issue by ensuring that my valve is operating well. And how do I ensure that? I can be carefree if it is in a fast-closing and a tight-shutoff mode.
Read Also: What Is Fullway Termination Valve: And Where Is It Located?
FAQs.
In an RV, the issues for a water heater check valve or a city water check valve differ from a water pump check valve. To clear out your confusion, I am answering these questions below.
Is there a check valve in the RV water system?
Since an RV has a comprehensive water system, it needs multiple check valves to operate. Check valves are also known as one-way water valves. These are utilized in various water applications, such as drinking water and wastewater.
Does an RV pump need a check valve?
Yes, an RV pump needs a check valve. Without the check valve, the water can flow in the reverse direction, which can cause overcapacity in the water tank. Consequently, your RV can have water leakage from the inside.
Do I need a check valve on my RV water heater?
Most RV water heaters will come with a check valve anyways. If a water heater does not have a check valve, the hot water can flow into the tank rather than toward the faucet. So, to avoid such accidents, you can use a check valve in your RV water heater.
Do I need a backflow preventer on my RV?
A backflow preventer is called a check valve. And yes, you need to use a backflow preventer, a check valve, in your RV. The ideal place to use a check valve in RV is with the water pump system.
How many check valves do you need in an RV?
Usually, most RVs have three check valves. But it is mandatory to use check valves in two places. One is with the pump, and another is with the city water outlet.
Read Also: Why Your RV Oven Pilot Won’t Light and What to Do About It?
Conclusion
The bottom line is you must use the check valve before the pump. Some RV water pumps have built-in check valves and don’t need external ones to prevent backflow.
Be careful to use the check valve wrongly. Since there are multiple spots for it in an RV, you might miss the ideal spot and use it elsewhere. The ideal spot is before the pump.
And in the case of water leakage or an overfilled water tank, always check the check valve first. Chances are high that it has malfunctioned, which resulted in these troubles.
Read Also: How to Light a Suburban RV Oven? (Things You Need to Know)

Zayan is an accomplished author and a go-to expert for all things RV and camper-related. With a passion for adventure and a knack for problem-solving, he has spent years exploring the open road and fine-tuning his knowledge of recreational vehicles.
Zayan’s writing is a testament to his expertise, offering readers practical solutions to common RV dilemmas. Whether it’s troubleshooting mechanical issues, optimizing space, or planning the perfect road trip, Zayan’s insightful advice and engaging storytelling make him an invaluable resource for both seasoned travelers and newcomers to the world of RVing.